
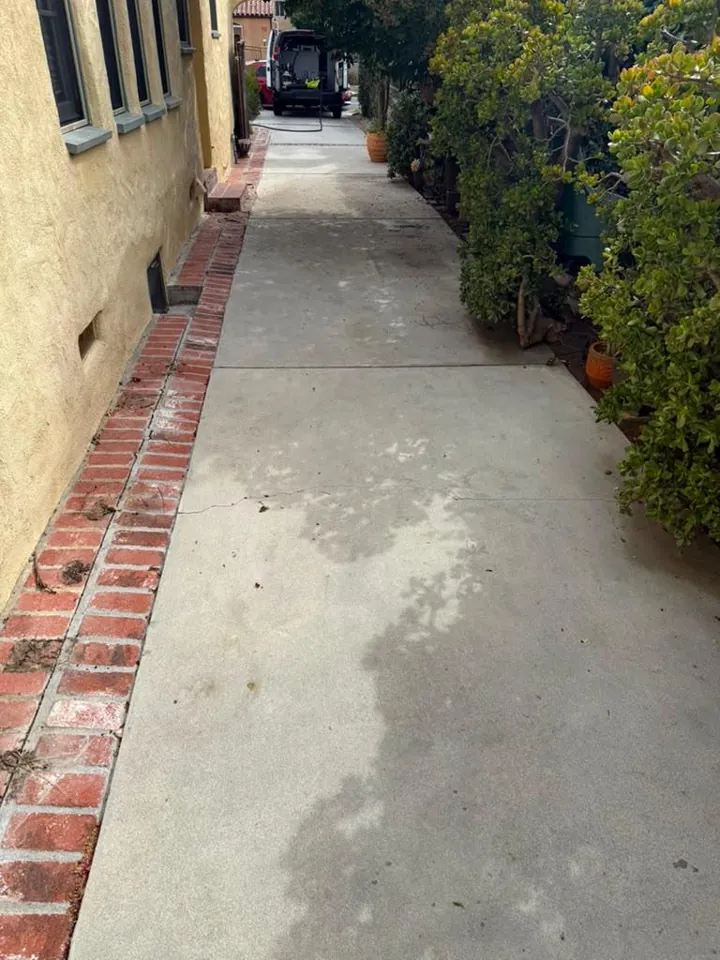
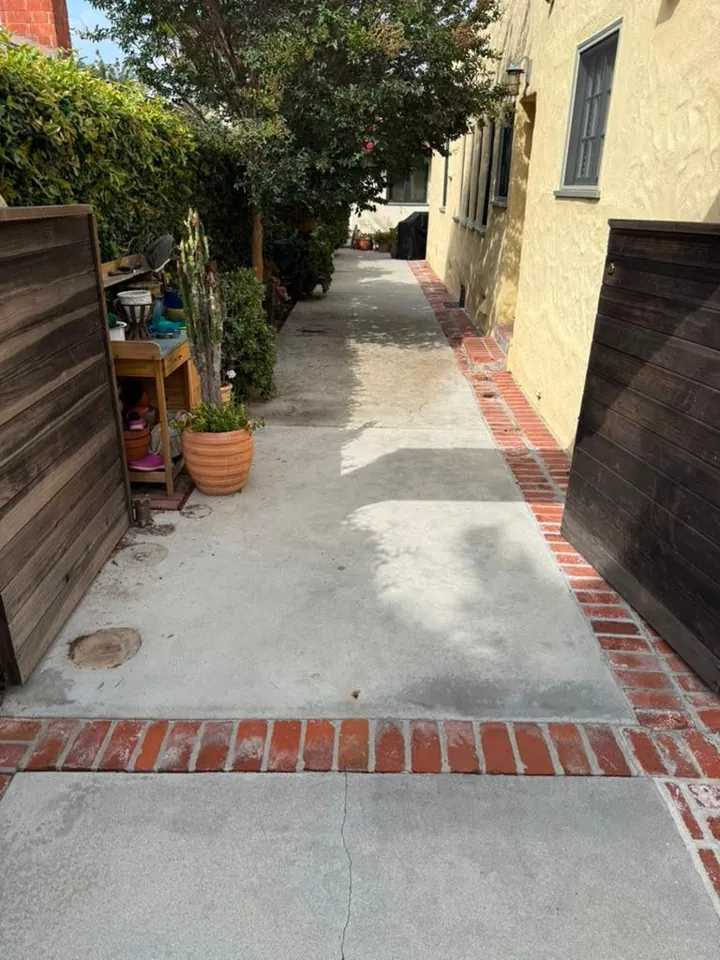
The walkway before cleaning
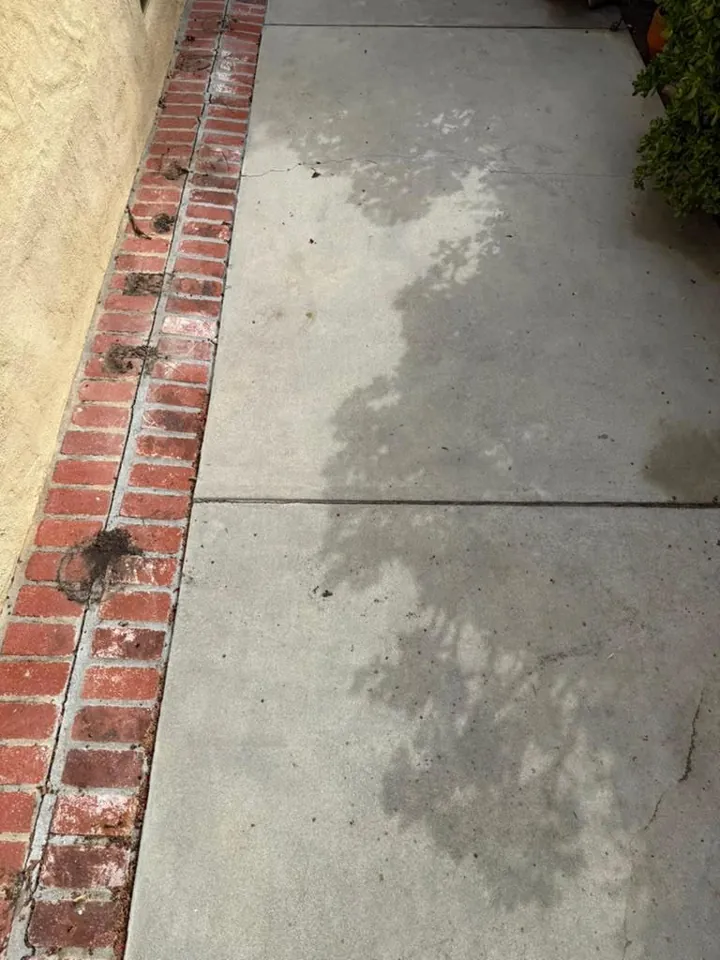
The walkway ran the length of a stucco house, with a red brick border on one edge and plants along the other side. It sat in shade most of the day. The concrete had gone gray overall, with darker staining that followed the shapes of the tree canopy above it. Where leaves and debris collected and sat, the concrete had darkened. The brick border had dirt packed into the joints.
This pattern is common in LA side yards. Shade keeps the surface damp longer, falling leaves leave tannin and organic residue, and sprinklers keep feeding growth. None of it is damage. It is buildup that sits in the top of the concrete.
 Before
 After
AfterWhat made this job tricky
Side yards are narrow. There is no room to swing a long wand from a comfortable angle, and the walls on both sides catch overspray. Here, the stucco wall and the plant bed were both within arm's reach of the concrete, so every step had to account for where water and cleaning solution would land.
Plants were the main concern. The cleaning solution that lifts organic staining can stress foliage if it sits on leaves. The approach was to wet the plants down before applying anything and rinse them again after, so any drift was diluted. The brick border also needed different handling from the concrete, because mortar joints do not tolerate the same pressure.
Pre-treatment: letting the foam do the work
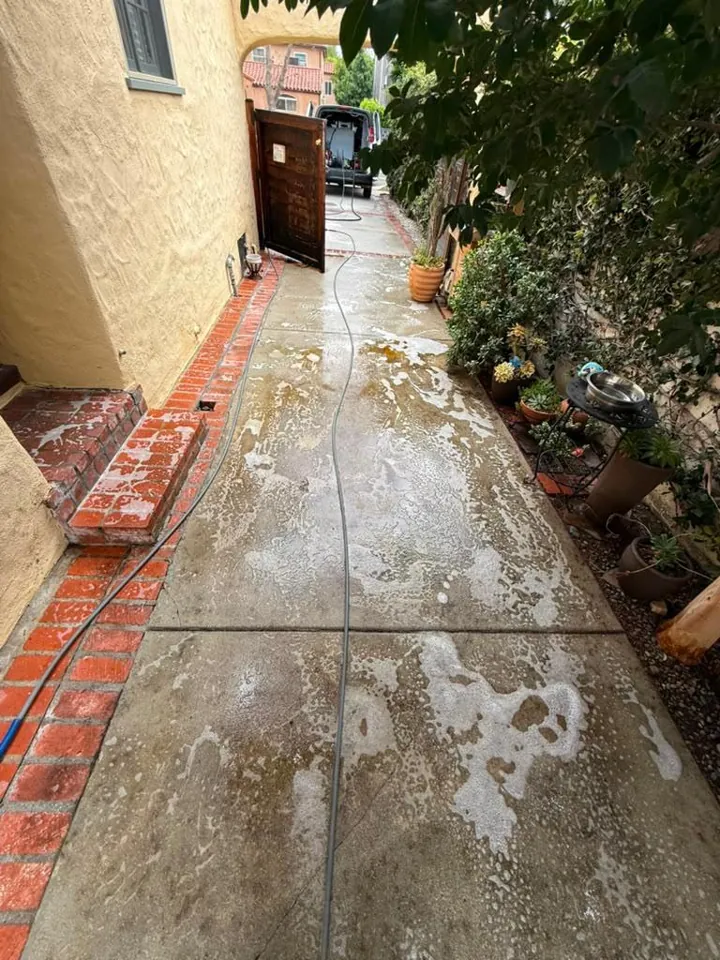
The first step was applying a cleaning solution across the concrete and the border. In the during photo, you can see it foaming on the surface while brown, dirty runoff lifts away. That is the dwell time doing its job. The solution breaks down organic staining and loosens dirt, so the rinse removes it instead of the pressure grinding at it.
Dwell time is the part most DIY attempts skip. Spraying and immediately blasting removes surface grime but leaves the stain in the pores, which is why a pressure-washed walkway can look clean while wet and blotchy once dry.
Cleaning and rinsing
After dwell, the concrete was cleaned with even, overlapping passes and rinsed in one direction along the walkway, so dirty water moved away from finished areas. The brick border was rinsed with a wide fan held back from the joints, to clear dirt without cutting into the mortar.
Rinsing order matters on a long walkway. If you rinse the middle first, runoff from the dirty end flows back across it and leaves streaks. Working in one direction keeps the finished section clean.
The stucco wall got attention too. Overspray and splashback carry dirty water onto the bottom of a wall, and if that dries there it leaves a muddy band. Rinsing the lower wall and the plants as the last step meant nothing dirty was left to dry on them.
The result
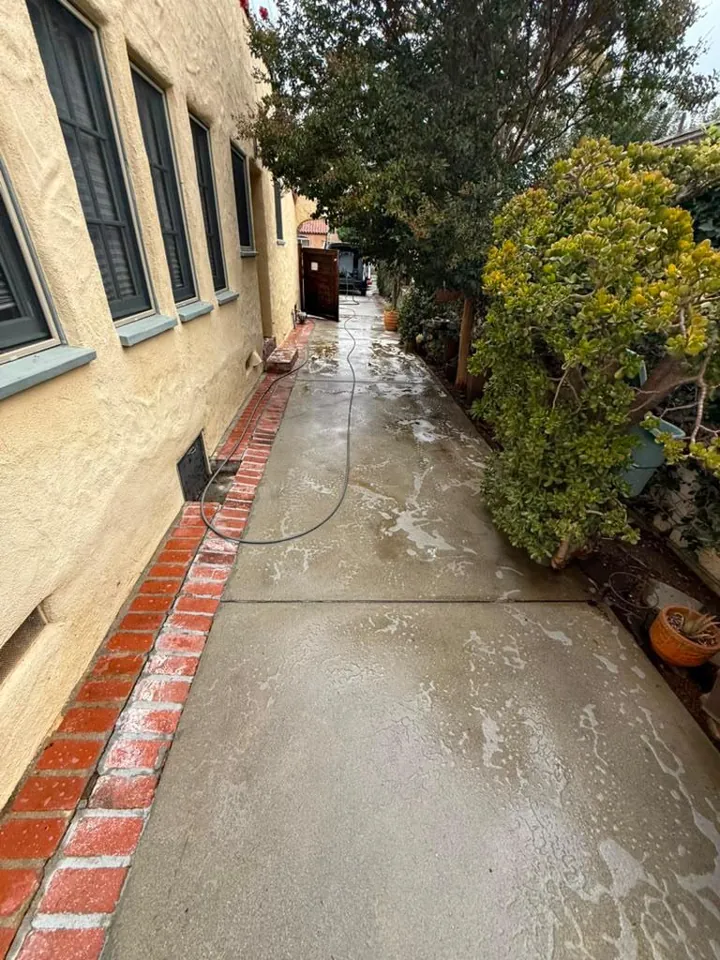
Right after rinsing, the walkway was wet and even, with no tree-shadow pattern left. Once it dried in the sun, the concrete was a uniform light gray, and the brick border had its red color back with clear joints. The before and after photos show how much of the dark pattern was surface buildup, not permanent staining.
Not every walkway comes out like this. Very old tannin stains, rust, and stains that have been sealed in can lighten without fully disappearing. Shaded concrete also starts collecting debris again, so the look lasts longest when leaves are swept regularly and sprinklers stay off the slab. Our guide to tree and leaf stains explains why these patterns form in the first place.
Pricing a walkway like this
As of October 2026, walkway and sidewalk cleaning on our instant quote calculator is $0.55 per square foot. A walkway 4 feet wide and 50 feet long is 200 square feet, or $110, so it would fall under the $195 visit minimum on its own. That is why many people pair it with a driveway or patio, which also earns the 5% two-service bundle discount. Say Wash It confirms the flat price before work begins and walks the finished area with you at the end.
Key points
Pre-treatment: letting the foam do the work
The first step was applying a cleaning solution across the concrete and the border. In the during photo, you can see it foaming on the surface while brown, dirty runoff lifts away. That is the dwell time doing its job. The solution breaks down organic staining and loosens dirt, so the rinse removes it instead of the pressure grinding at it.
The result
Right after rinsing, the walkway was wet and even, with no tree-shadow pattern left. Once it dried in the sun, the concrete was a uniform light gray, and the brick border had its red color back with clear joints. The before and after photos show how much of the dark pattern was surface buildup, not permanent staining.